No-Knead Caraway Rye Bread
- Andrea

- Feb 21, 2024
- 5 min read
(Skip to the recipe)
This post was from my former blog, but I want to reshare it here. It was originally posted on November 24th, 2018, but I think you'll enjoy it - who doesn't love bread?! Homemade bread is not only delicious, but also doesn't contain dough conditioners, preservatives, or any additives that you will find in store-bought breads (even from a bakery).
This recipe includes caraway, which is traditional for some rye breads. Caraway (Carum carvi) is a biennial herb belonging to the Apiaceae family, which also includes parsley, dill, and cumin. It is native to Western Asia, Europe, and North Africa but is now cultivated in many parts of the world. Caraway is known for its distinctive aroma and flavor, which is warm, slightly sweet, and reminiscent of both anise and fennel.
Benefits and uses of caraway include:
Digestive Health: Caraway is commonly used to alleviate digestive discomforts such as indigestion, bloating, and gas. Its carminative and digestive properties help to soothe the stomach and promote healthy digestion.
Appetite Stimulant: Caraway is believed to stimulate the appetite, making it useful for individuals with poor appetite or those recovering from illness.
Respiratory Support: Herbalists suggest that caraway can help relieve coughs and congestion by promoting expectoration and clearing the respiratory passages. This is typically administered in tincture or infusion form.
I hope you enjoy this recipe!
I love bread. Growing up, we made bread every week. I never had those bread-like fluffy loaf products (sorry Wonderbread) in my lunch box, and I still do not. I still make bread almost weekly, and when I cannot, I buy bread from a local bakery. But there is nothing quite like the smell of rising and baking bread, and the toothsome satisfaction of eating a freshly cut slice.

My favorite kind of bread is rye. Growing up in Milwaukee, Wisconsin, rye bread was ubiquitous. With a high concentration of people from German and Polish heritages, it makes sense why rye bread is a staple in restaurant bread baskets in this city. Most rye breads, including my recipe below, are actually "maslin" breads: a blend of rye and wheat flours. All-rye bread loafs tend to be dense and do not rise well because rye has less available gluten. The addition of wheat flour greatly helps to produce a well-risen loaf with a beautiful interior texture.
I have tried many, many rye bread recipes, and the one I have below is my ideal. I developed it from Jim Lahey's 2009 book My Bread; his recipe got very close to what I like in my rye bread. My Bread is an excellent book, and if you are interested in bread-making, I strongly suggest you buy this book or check it out from your local library. Lahey shows how the home baker can make bread that will rival any professional bakery. The secret is using a dutch-oven inside your regular oven to create a micro-climate for baking. Plus, his no-knead method is a time saver (although it does require a little planning because of the 8-12 hour rise time). It is completely realistic to make a few loaves each week.
When I bake bread, I do not weigh my flour, although I know that is the preferred method. I find that it takes more time and dirties up more dishes. I use the scoop-and-level method for measuring flour, and I adjust my liquids so I get the right texture. It's easy, but you might need to make a few loaves to get the liquid level just right.
Caraway Rye Bread
2 cups all-purpose unbleached flour (I prefer King-Arthur organic)
1 cup dark rye flour (I prefer Bob's Red Mill organic)
1/3 tsp bread yeast (Do not use quick-rise yeast. I know this seems like not enough yeast, but with the long rise-time, it is.)
1 tsp Kosher salt (I use Diamond salt. If you use another type, please adjust the amount.)
1 TBS whole caraway seeds
1 1/4 to 2 cups room-temperature water
1. Combine all-purpose flour, dark rye flour, yeast, salt, and caraway into a medium mixing bowl. Stir to distribute all ingredients.

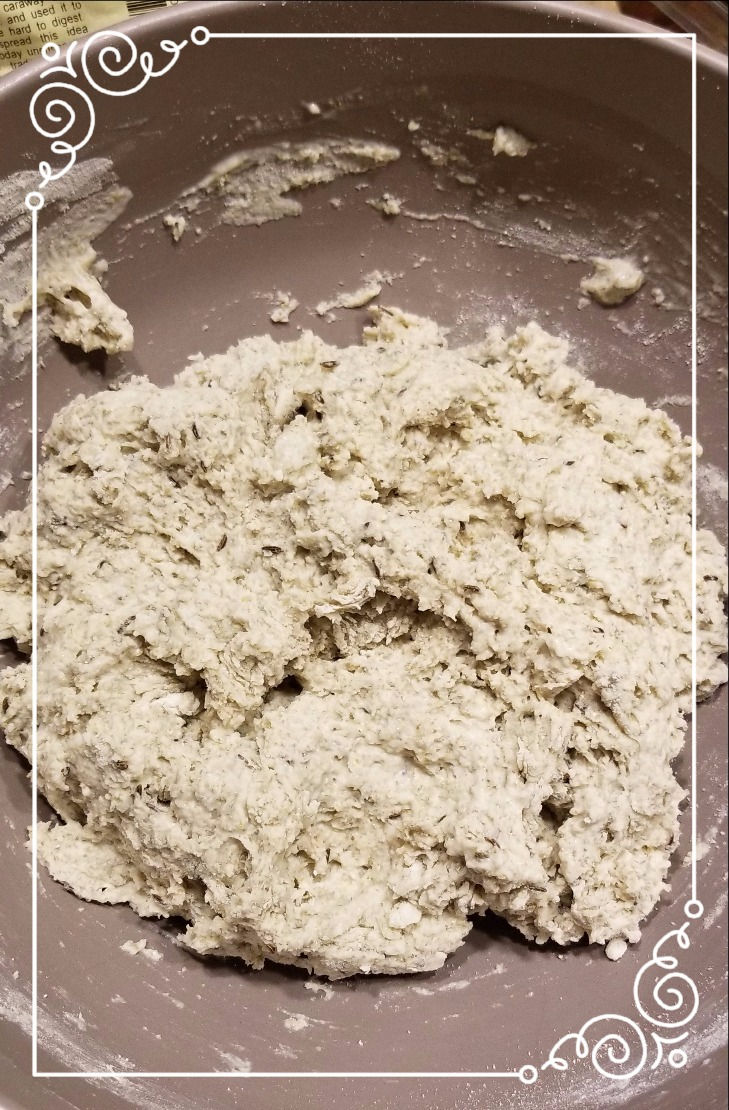
2. Add at least 1 1/4 cup water, and start to stir with a wooden spoon, spatula, or your hands. Have additional water ready. As the dough starts to come together, you will see if it needs more water. It should come together in a shaggy mass like the image below. It should not be too liquidy, nor too stiff. It will not, however, look smooth like a traditional bread dough. But don't worry, it will. We are using time to develop the gluten strands instead of all that kneading.

3. Once it looks like the image above, gather it into a loose ball, and place it back in the bowl. Cover the bowl with plastic wrap, a damp towel, or a beeswax bowl cover, and set it out of the way for 8 to 12 hours. In the summer, this dough rises quickly, in the winter it takes a little longer. I would not recommend it going longer than 14 hours, however. You will know it is ready when it has almost doubled in size and you can roll it into a smooth ball.
4. When risen, turn out onto a well-floured surface. Give it a few turns, and gather it into a ball. Cover with a floured tea towel, and let rest for 30 minutes to an hour (depending on how warm your kitchen is.)

5. Put your dutch-oven with cover into the oven and pre-heat to 475 degrees F. (I use a Le Creuset 6.75 quart oval, but any about that size will work.)
6. When your oven has pre-heated, open the oven and dutch-oven, add a little flour or cornmeal to the bottom of the dutch-oven, and quickly add in your ball of dough. I use a dough scraper to help with this. Replace the lid on your dutch-oven and bake for 30 min.
7. After 30 min. remove the lid from your dutch-oven and continue to bake for 15 to 20 min.
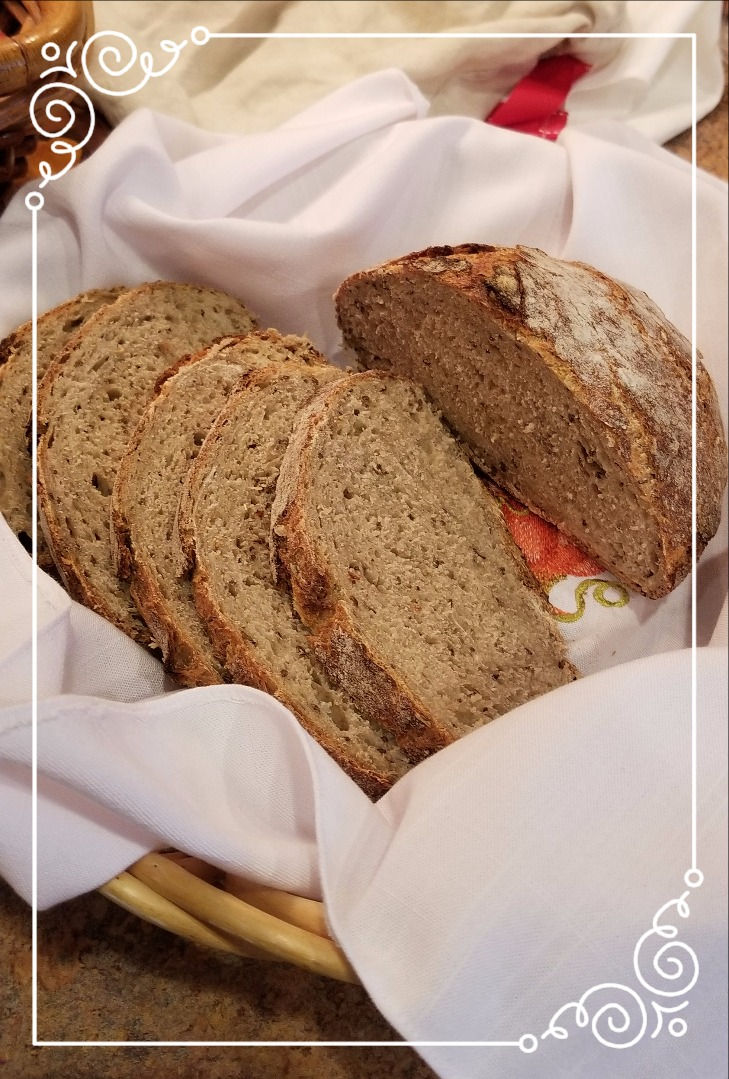
8. Remove the bread from the dutch-oven and allow it to cool on a rack before slicing. Because of the high temperature of the oven, your bread will "sing" - creak and crack while cooling. In my opinion, this is one of the best sounds in the world.
If you try out this recipe, I would love to hear how it went for you! Please leave your comments below, or on social media.

_____________________________________________________
* I use occasional Amazon.com affiliate links for books and other products I endorse. This blog will get a small portion of the sale to help offset the web-hosting expenses. If you like this blog, please consider using the embedded links when you purchase these products.
**Legal Disclaimer: Adhara Alchemy is not a licensed medical professional practice and I am not a licensed medical professional. The information provided in my consultations is intended to support your overall health and wellness and is not intended to replace medical advice or treatment. It is important to work with your primary healthcare provider and inform them of any herbs or supplements you are taking. Herbs may have side effects, cause individual sensitivities, or interact with medications, and it is important to discuss these risks with your healthcare provider.


Comments